Add an Existing or Create a New Release Condition
Create and attach a Release Condition to your course material.
1- Select the activity (Quizzes, Assignment/Dropbox, Discussion topic) or a Content Topic in your course’s content area.
2- Navigate to Release Conditions
Activity (Quizzes, Assignment/Dropbox, Discussion)
-For any of these activities, release conditions are located under the Restrictions Tab when editing the activity.


Content
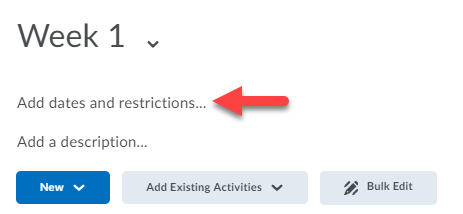
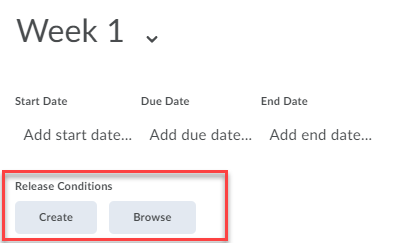
-Under the Module name, click on Add dates and restrictions.
Awards
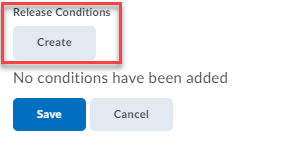
-Locate the Award and click on Edit Properties.

Intelligent Agents
-Locate the Intelligent Agent and click on Edit. Release Conditions are located under Criteria section.


3- Select Create / Create and Attach to create a new condition or Attach existing / Browse if you have already created one.
Create a New Condition
– Use the Condition Type drop down menu to select what area to restrict by.
Click here for a full documentation on Release Condition types.
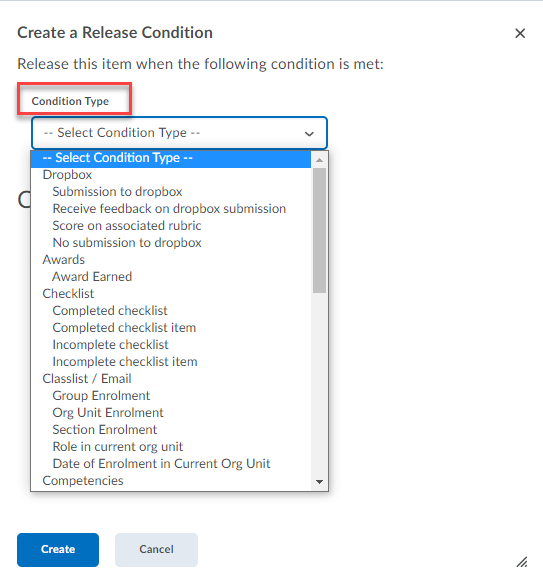
– The Condition Details drop down menu will update based on what was selected for Condition Type. Select the specific requirement.
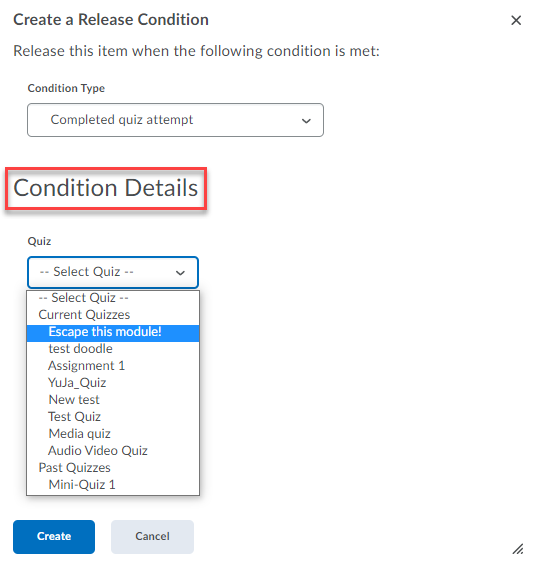
– Based on what was selected above, additional information may be required. If you have selected a Quiz, you will be required to input the number of attempts. Once all information has been entered, select the Create button.
Add Existing Condition
-Select the release condition(s) to be used by checking the box to the left of the condition(s). If you have a long list of available release conditions, you can use the View Conditions for drop down menu to filter by a specific tool.
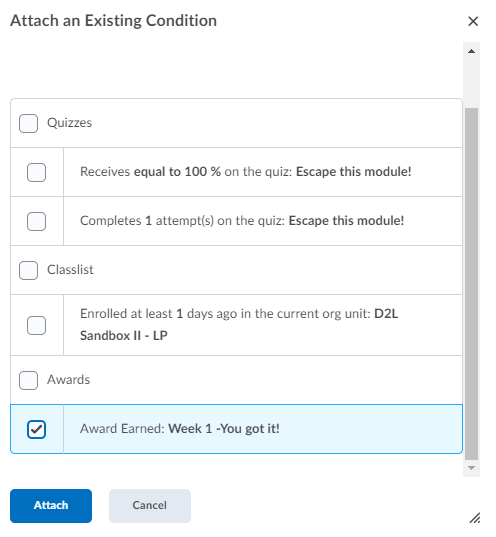
-Select the Attach button.
4- Once a release condition has been attached, a new menu that allows you to set how conditions must be met will become active. This menu is only relevant if you have more than one condition attached. If so, select one of the following options:
- All conditions must be met
- Any condition must be met. Selecting Any condition must be met means that a participant must satisfy only one of the conditions listed to access the restricted course material or activity.

5- Select one of the Save options at the bottom of the screen to save your changes. Once you have set the release conditions the Release Conditions icon will appear, indicating that one or more conditions must be met in order to access to the item.

This icon is not visible to students.
Once you have created a new Release Condition, you cannot delete it from the course; it remains on your list of existing Release Conditions. You can, however, detach it from a particular item. Click here to learn how to remove a release condition from a particular item.

