
Add links to Course Navbar
Add links to your course navbar for easy access. If you use a particular D2L tool frequently and you would like to access it quickly, you can create and add custom links to your course navbar.
Navigation and Themes - Create a Custom Navbar - Administrator (YouTube)
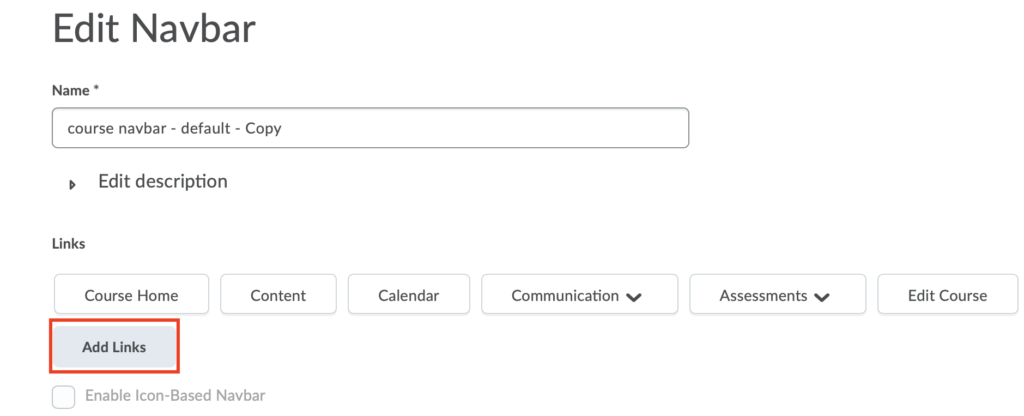
1. On your course navbar, click on the … to the right and then select Edit This Navbar.

2. Click on Add Links.
3. From this window, if you would like to add a specific category of items to your nav bar like checklists, class lists/emails, or Dropbox, you can select them and click “Add”.
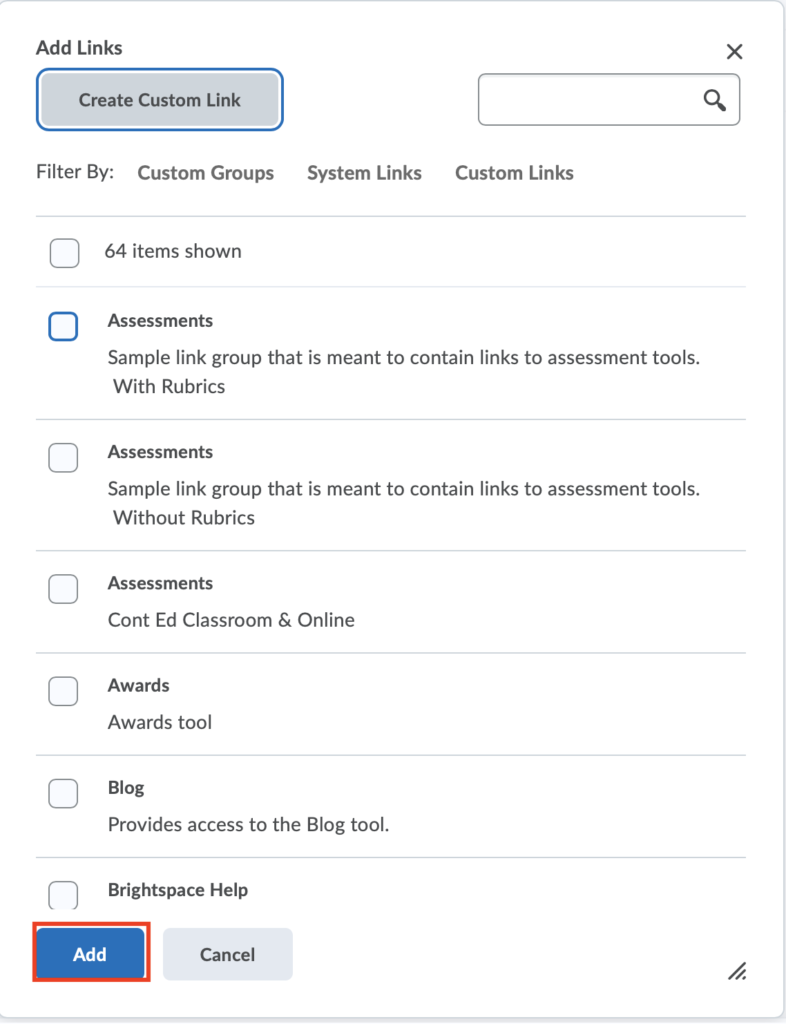
This will add the category of items you selected to your nav bar for the course so that you and your students have easy access.
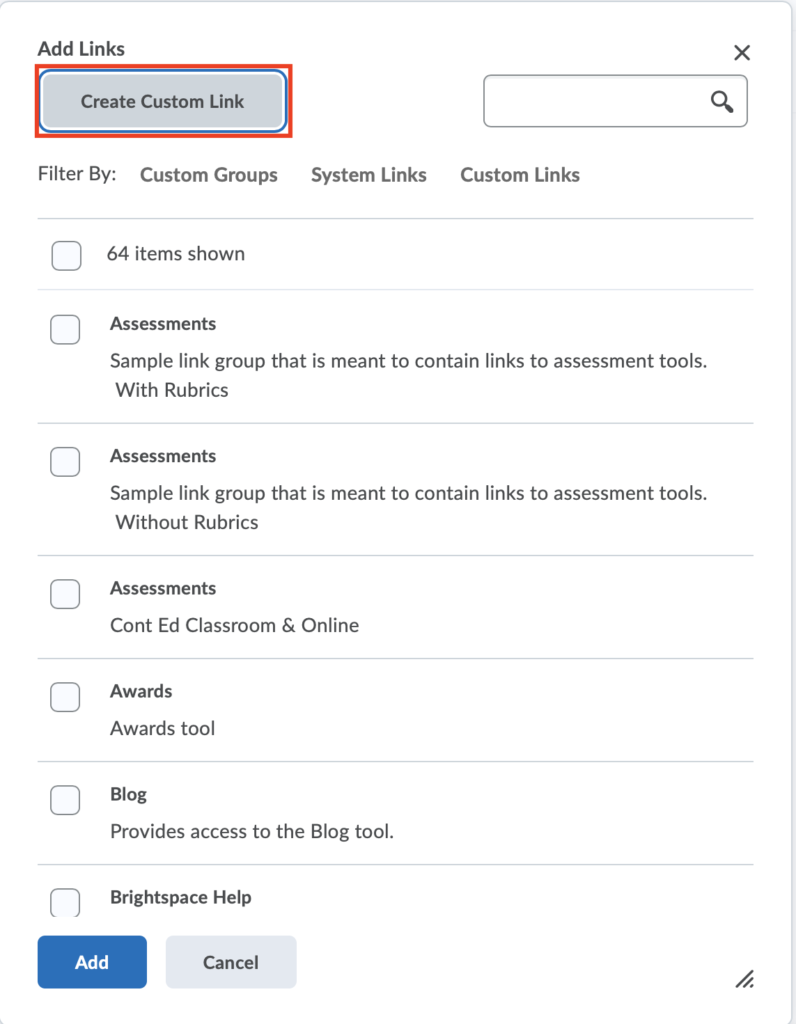
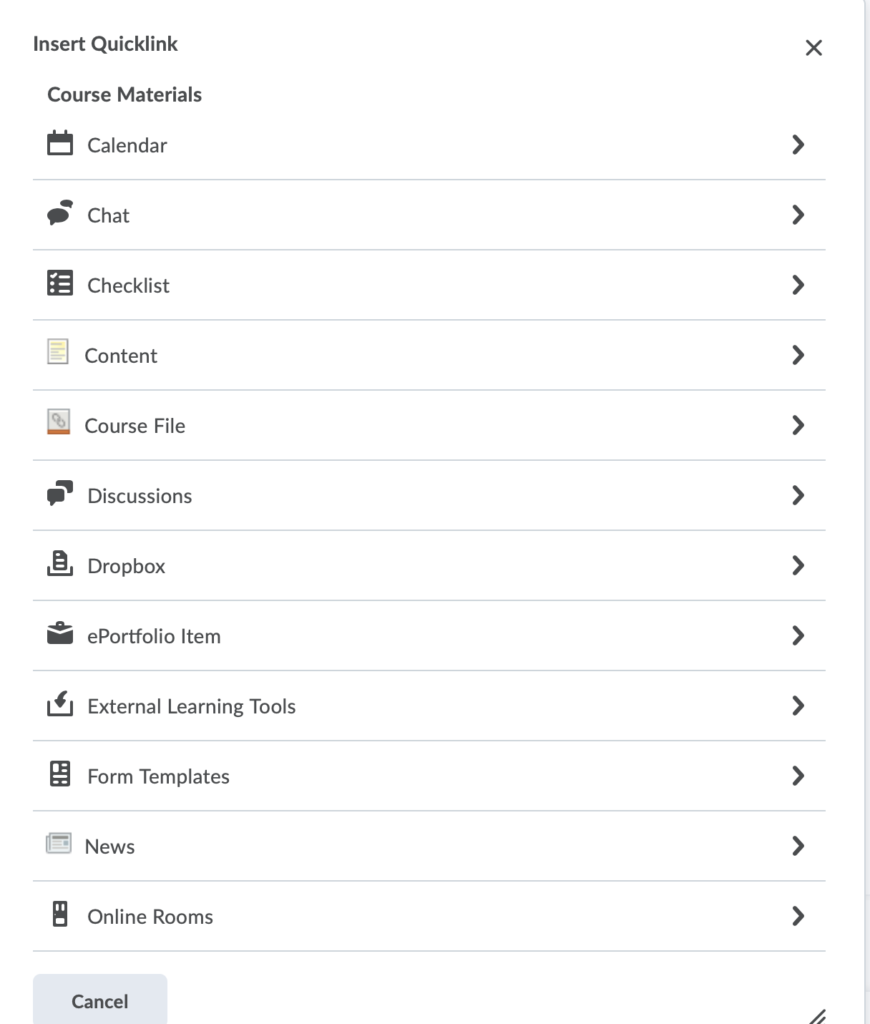
4. If you would like to add a specific item, like a specific checklist, Dropbox, or discussion board, click on Create Custom Link.
5. In the Create Custom Link window, enter a name for the link, click on Insert Quicklink.
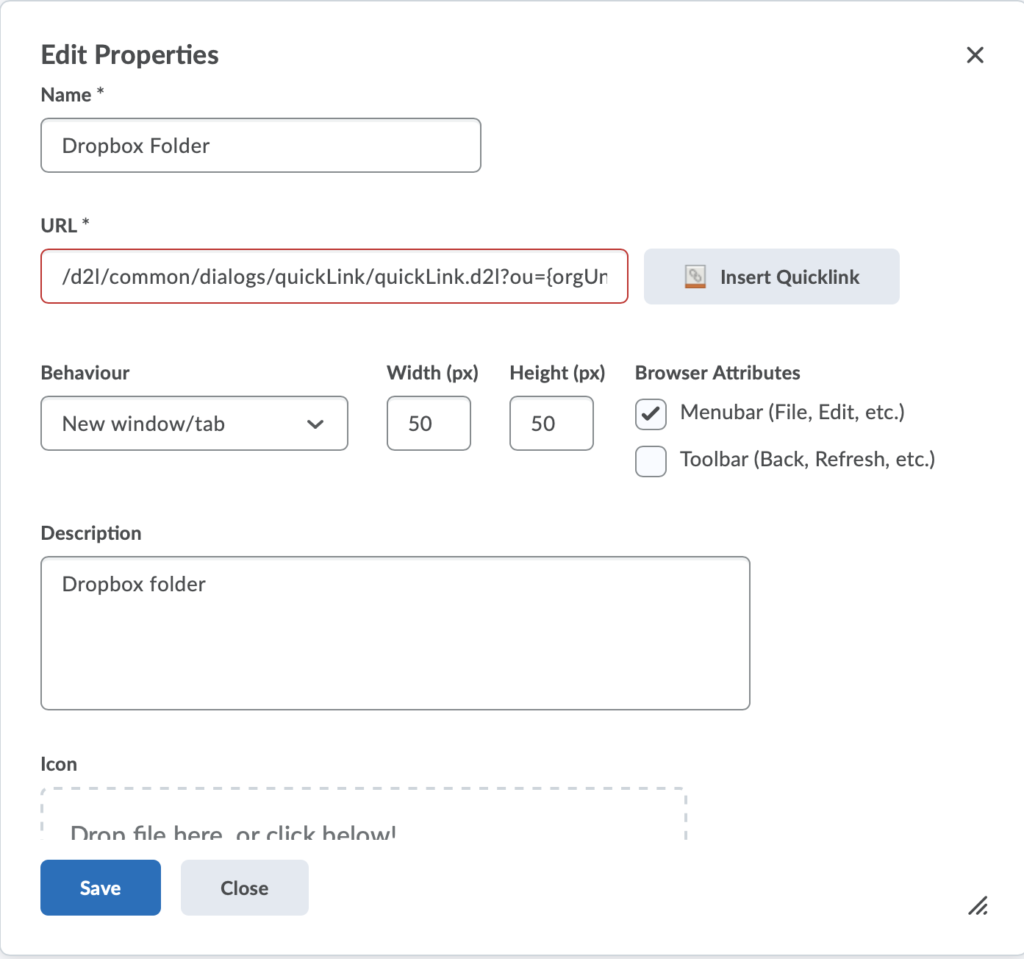
6. Click on the category of the item you want to add and then select the item you actually want to add.
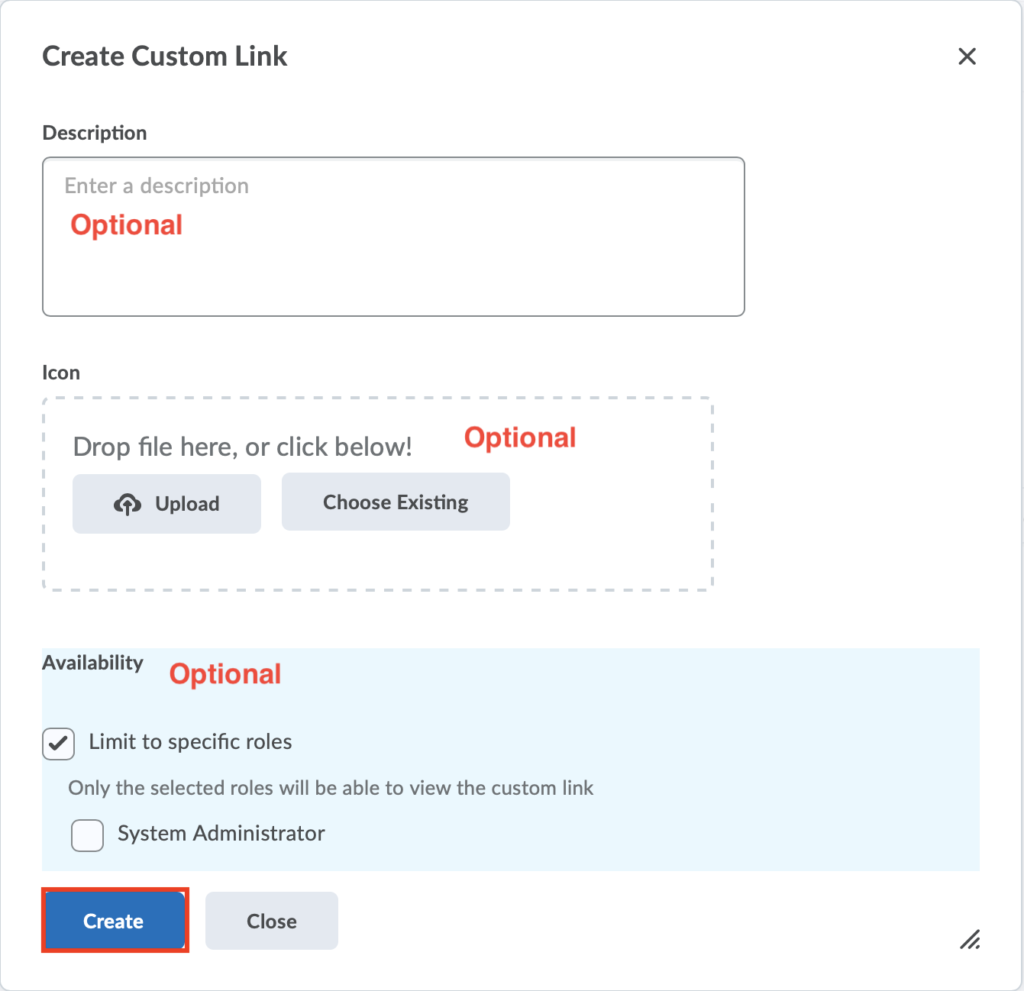
7. After selecting the URL, you can decide to enter a description or upload an icon or choose an existing icon. You can also limit the availability of the icon to specific roles such as TA’s, students and other options. Click on Create when done.
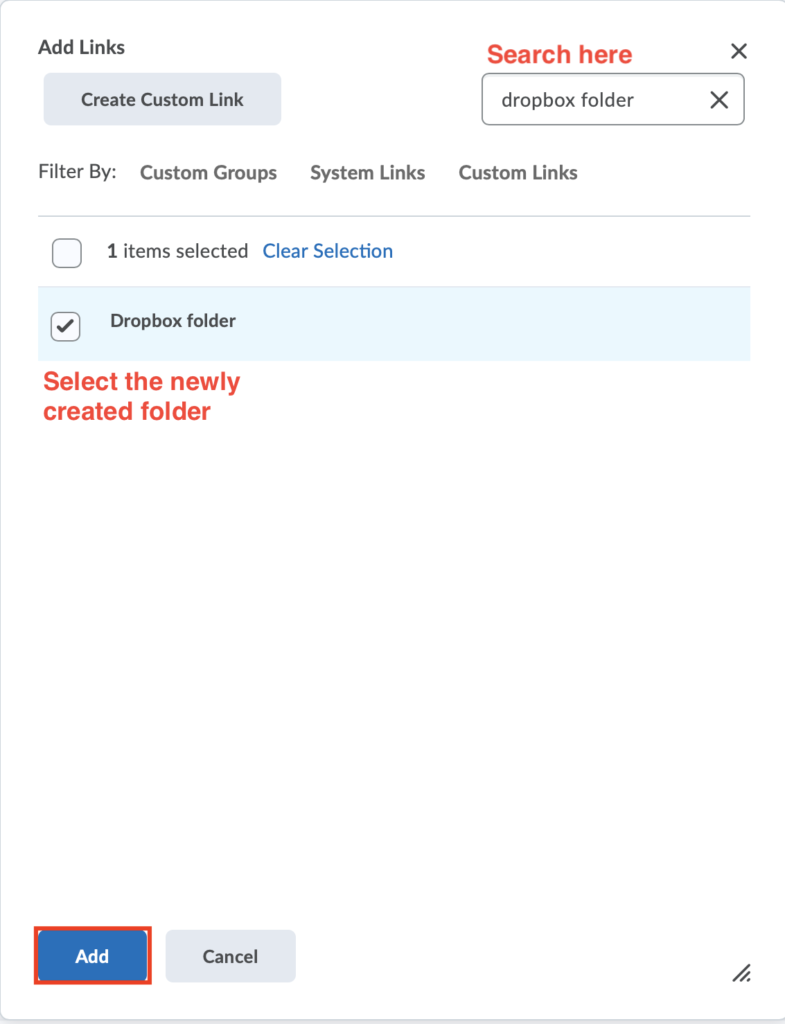
8. To add the newly created link to your course navbar, click on Add Links again, search for the new link you just created using the search button or just scroll through the list until you find it. Select the link and then click on Add.
9. Click on Save and Close.
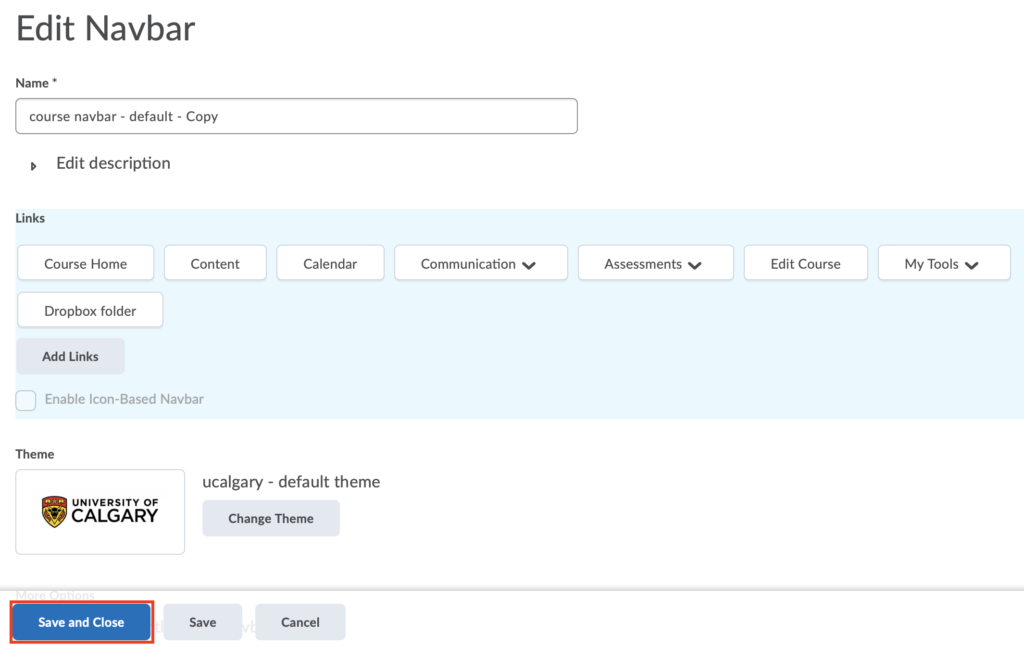
10. The link will be added to your navbar .

