Auto-Transcription in Zoom
The Auto-Transcription feature in Zoom produces closed captions of everyone speaking in the meeting and attendees can see them either as subtitles or a live transcript. This increases accessibility for participants without requiring an individual to manually input caption during the meeting.
To activate Auto-Transcription, you must be the host or co-host of the Zoom meeting. By default, this option should be visible to you, but if it has been turned off, follow these steps to enable Auto-Transcription as the meeting host.
- In your Zoom window, click the CC: Live Transcript icon on the meeting control bar.

2. Click Enable Auto-Transcription under Live Transcript, at the bottom of the dialog.
3. The Live Transcript will now be available as subtitles at the bottom of your Zoom window.
To view the Live Transcript, other participants may have to turn on subtitles or transcription in their own Zoom window.
Enabling Auto-Transcript
Before you can activate Live Transcript/ Auto-Transcription within the meeting, you may need to enable it under your Zoom account settings. To do so:
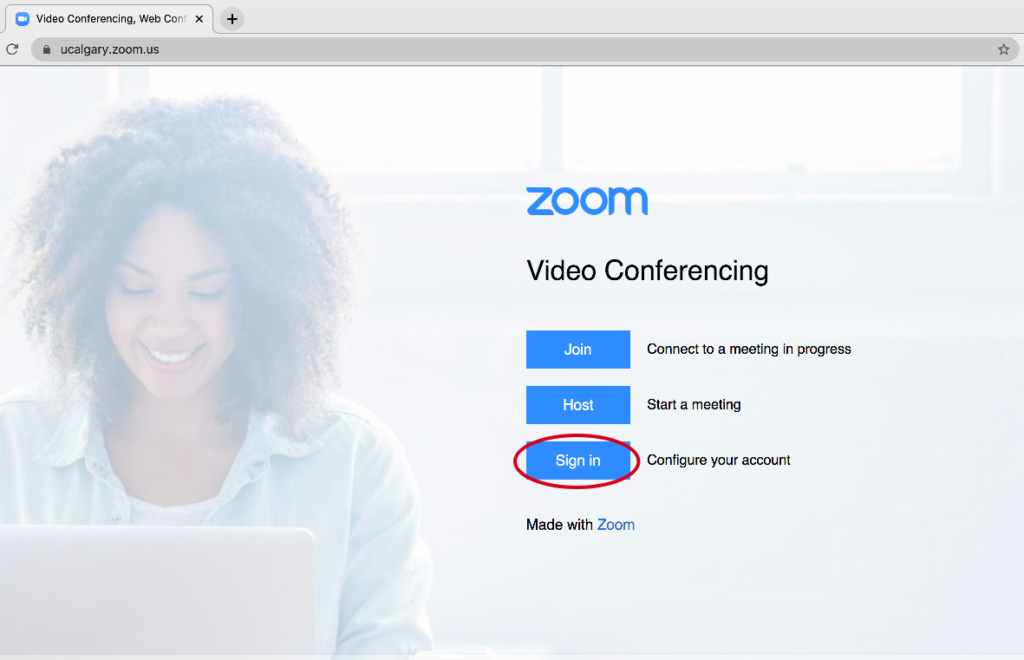
- Log in to zoom at ucalgary.zoom.us, using your IT username and password.
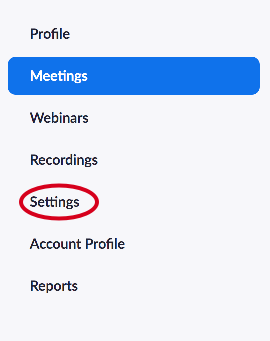
2. Choose Settings from the Zoom main page.
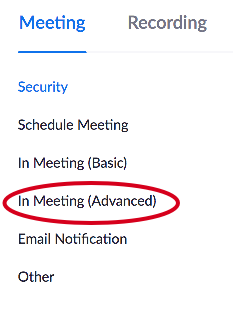
3. Click into the In Meeting(Advanced) section.
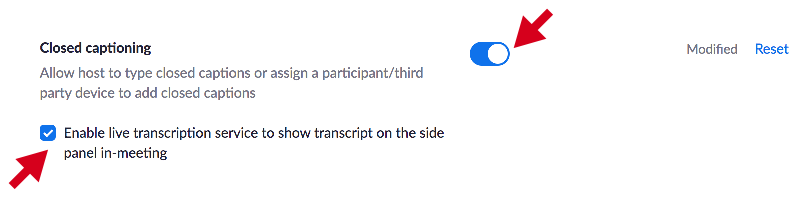
4. Scroll down to “Closed Captioning” and ensure that the setting is turned on, and the select box for Enable live transcription service to show transcript on the side panel –in meeting is selected.