Using Zoom Registration
The Zoom Registration option can be used to gather registration information (name, email address, date and time of registration) of your participants. Participants will have to register for the meeting using the registration link and afterwards the zoom meeting information will be sent to the participant.
Setting up Registration
1. Sign into your UCalgary zoom account using ucalgary.zoom.us with your UCID and password.

2. On the top right-hand pane, click on Schedule A Meeting.

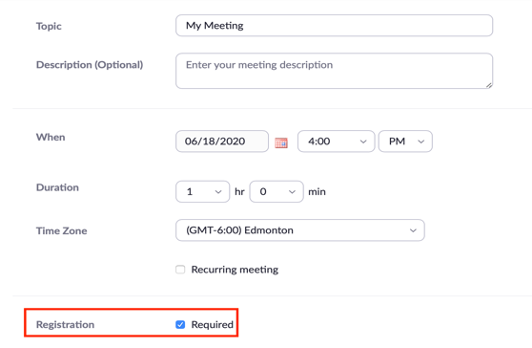
3. Select your desired options. Check the Registration: required box and click on Save.
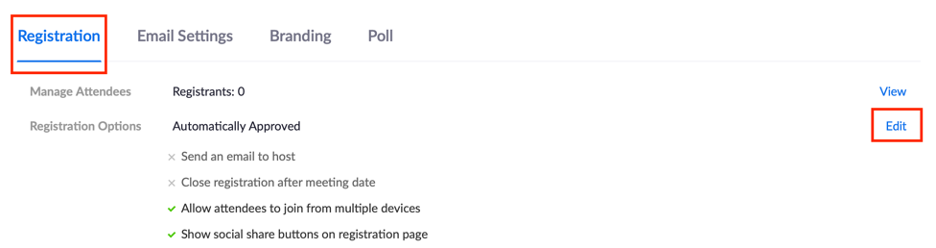
4. After saving the meeting, on the opened window that shows the meeting, scroll down to the end of the page that shows Registration and then click on Edit.
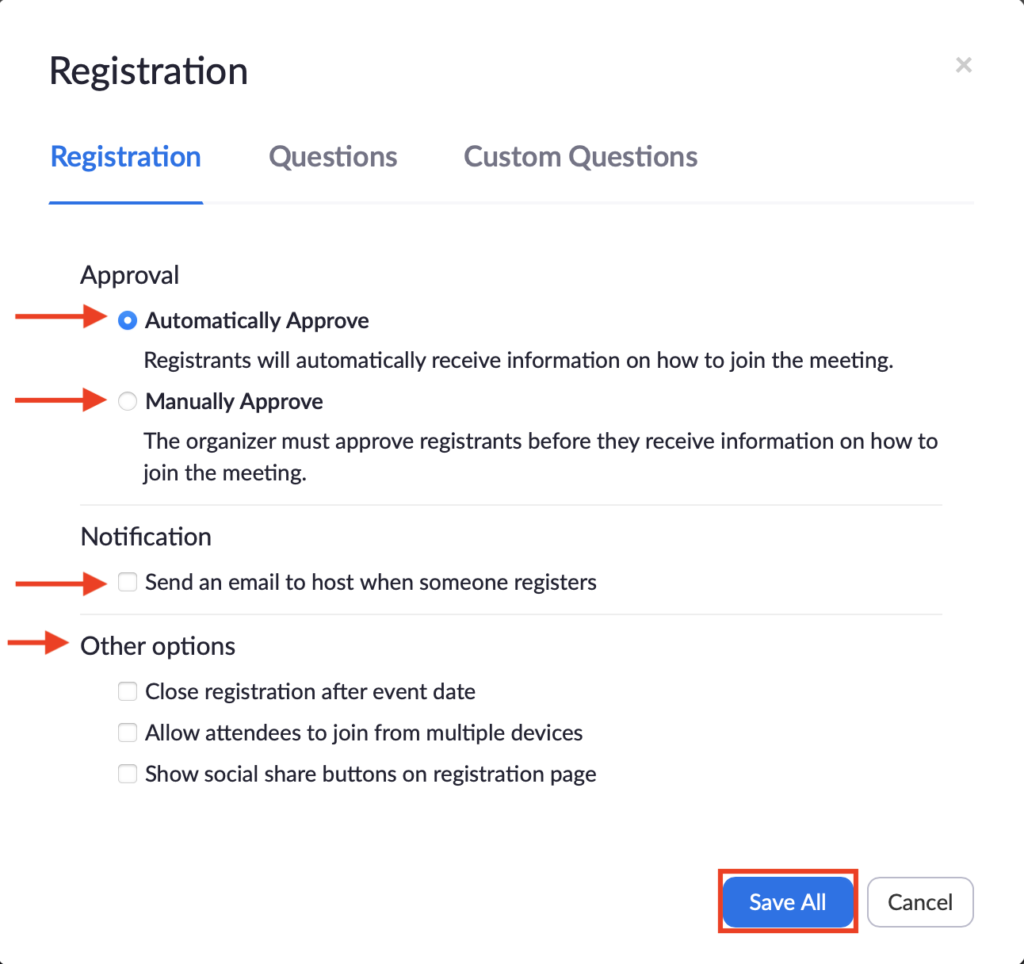
5. You can either select Manually Approve if you would like to approve who gets into your meeting or select Automatically Approve if you would like zoom to admit anyone who registers for the meeting. For Manually Approve, It is advised to check the Notification box in order to get an email when a student register so you can then approve. Select the other options you would like for your meeting. Click on Save All when done.
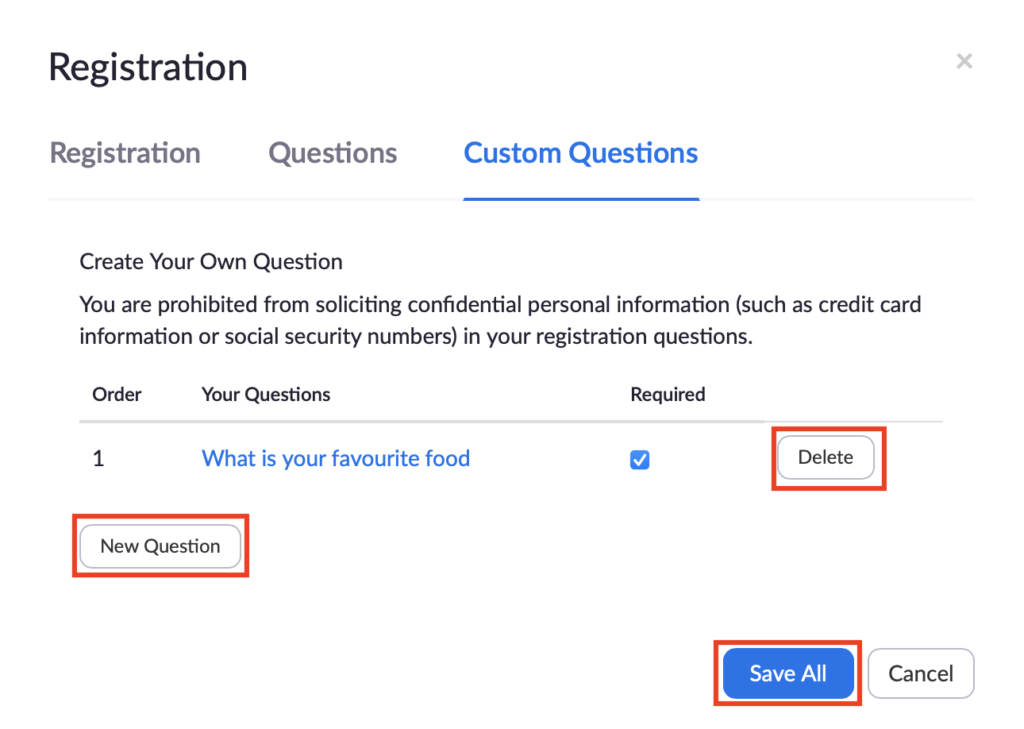
6. (Optional): Create a required Custom Question to add any additional questions you would like to add. Click on Create when done and then click on Save All.

Click on New Question to add another question. Click on Delete if you would like to remove a question. When all questions are ready, click on Save All.
7. Send the Registration Link to participants by clicking on Copy Invitation.

Accepting Registrations for Manual Approval
1. Sign into your UCalgary zoom account using ucalgary.zoom.us. Sign in with your UCID and password.

2. Click on Meetings to access and edit pre-scheduled meetings. Click on the meeting you want to edit.

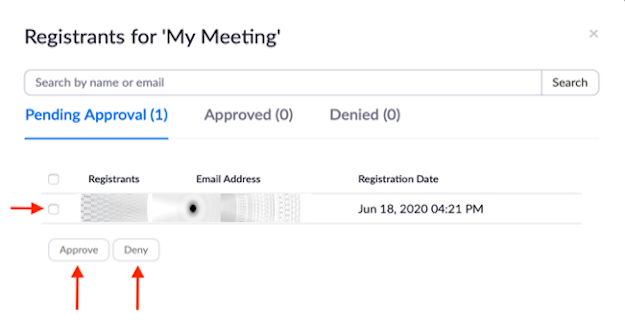
3. Scroll down to the end of the page that shows Registration and then click on Edit beside Registrants.

4. On the Registrants window, see participants pending approvals and their email address. Check the box beside their name and click on Approve or Deny. After you approve a participant, the meeting ID and password will then be sent to the participant.