
Adobe Connect Meeting: Managing Recordings (edit, convert, download, share)
A host can record a meeting and share it with others after the session. By default, the meeting recording is assigned a URL. To play it, you need an internet connection, the recording link and permission to view it.
If you wish to save the recording as a local file on your computer, we ask that you complete the process before November 15, 2020. Please see steps below on how to edit, convert and download your Adobe Connect Meeting recordings.
A. Edit, convert and download a recording for offline viewing
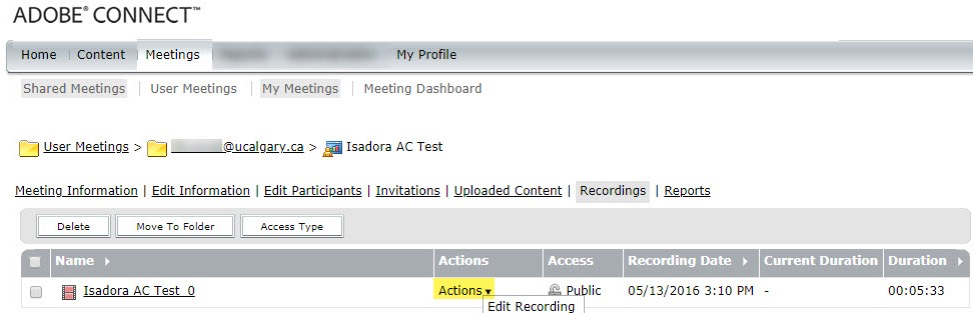
1. Locate the recording
Log in to https://connectmeeting.ucalgary.ca and locate the recording you wish to convert for offline viewing. If your session was created in D2L, you will still be able to find the direct meeting link and associated recording on https://connectmeeting.ucalgary.ca Click here for further instructions.
2. Edit a recorded meeting
Editing a recording is useful if it contains sections of silence, personal or irrelevant information that you wish to remove before making the recording available.
Click Actions then select Edit Recording
- Simply click the Play button to watch the recording from the beginning, or first drag the progress marker to a specific location.
 Controls to edit meeting recordings.
A. Play button B. Progress marker C. Selection markers surrounding selection D. Cut E. Undo F. Volume control - Use the selection markers to specify the areas of the recording you want to remove, and click the Cut button. See more options.
- In addition, you may want to hide Chat Pod, Attendee Pod, or Q&A Pod or a combination of these pods. To protect the privacy of individuals, you can also hide the names of the attendees. Click on Settings and select the appropriate boxes.
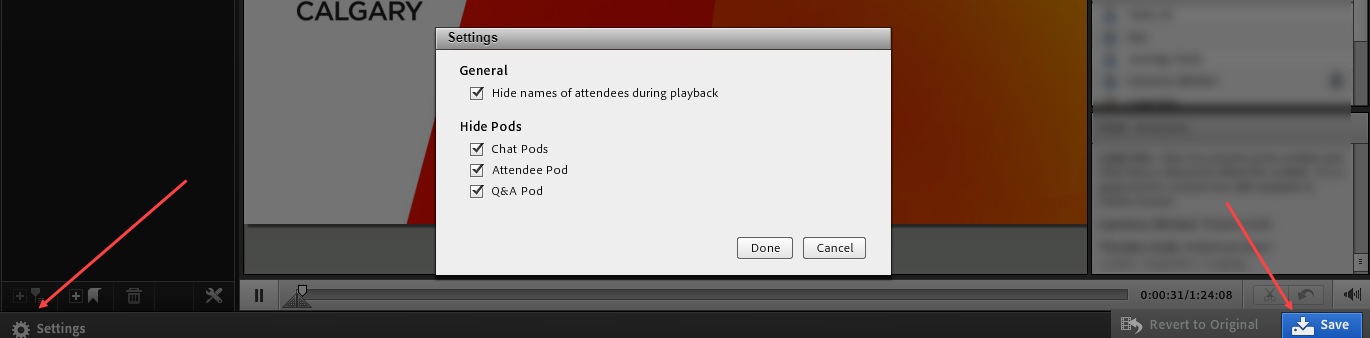
- When you have finished, click Save.
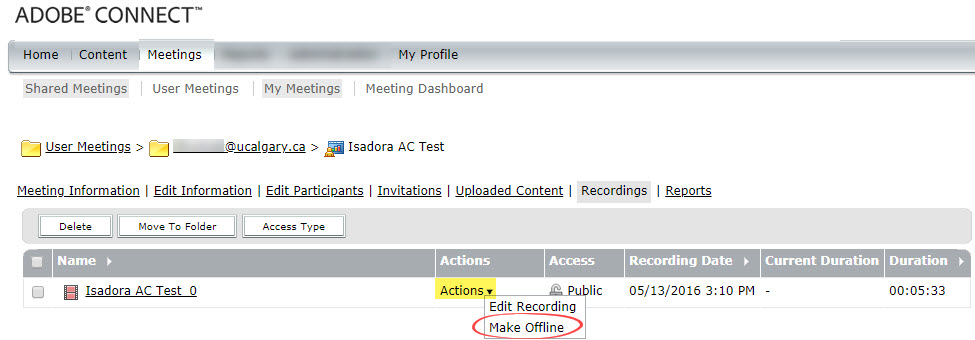
3. Convert and download a recorded meeting
Click Actions, then select Make Offline.
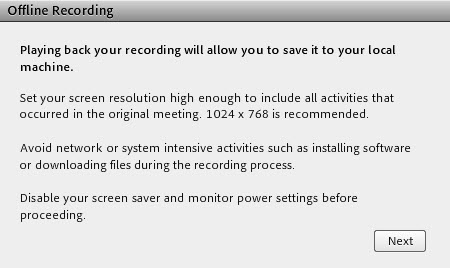
The recording will open in the Adobe Connect Meeting application, along with a pop-up dialog. If the application/ add-in is missing, you will be prompted to install it or you may download it directly from here. Be patient, as it may take some time for the window to load. Click Next.
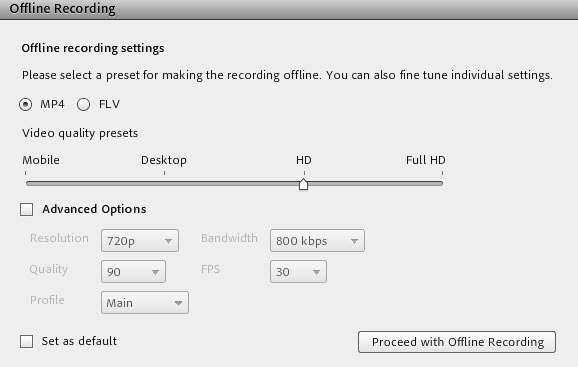
4. Choose your output option
MP4 is the recommended format. (Other options can be modified, if desired.) Click Proceed with Offline Recording.
Browse for a local directory to save your file, e.g. Desktop. The recording will play in the application while it gets converted to a video on your computer. In other words, it will take the whole duration of the meeting to convert it. A dialog box will pop up when the conversion has finished, providing details about the recording. Click OK.
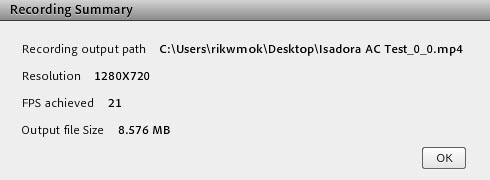
IMPORTANT: Review the offline recording to confirm that it has been converted properly.
For more information on how to manage Adobe Connect Meeting recordings, please visit https://helpx.adobe.com/adobe-connect/using/recording-playing-back-meetings.html
B. Share the Recording
Once you have a copy of the video (MP4) file on your computer, you may choose to re-use or share it with a new audience. Check out the link below for different options.
