
5 things you can do in Top Hat
Top Hat complements Brightspace/D2L, providing additional functionalities that enhance teaching and learning experiences. Here are 5 things Top Hat enables you to do.
1) Use different types of questions in quizzes
Both D2L and Top Hat have quiz tools, but Top Hat allows you to set up questions which are not available in D2L Quizzes, such as Click on Target.
Example: Click on Target question. To create a Click on Target question, upload an image, graph or diagram and ask students to click on the part where something is located (see below).
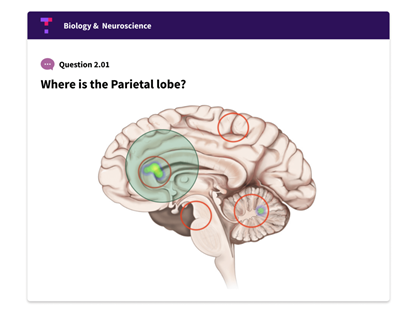
Detailed instructions: Creating a Click on Target Question
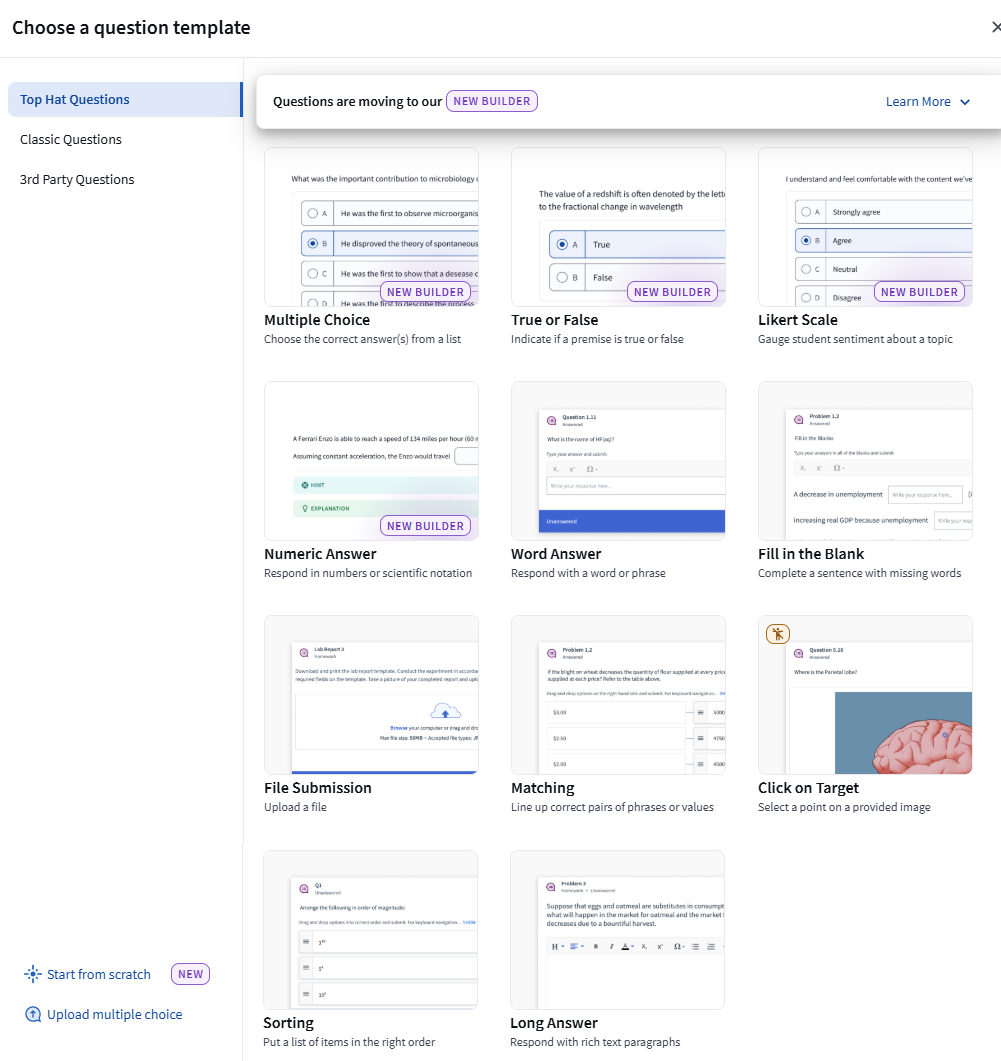
Other types of questions supported by Top Hat are shown in the screenshot below.
Top Hat enables you to run real-time quizzes and project them on the screen. You can also assign them as homework. More on presenting a question in Top Hat: Asking a Top Hat question
2) Run real-time class discussions
Both D2L and Top Hat have Discussions tools, but D2L discussions are best used asynchronously, while Top Hat discussions can be run in real-time and livestreamed on Zoom. They can also be continued outside class or assigned as homework to remote students, using the Assign feature (for more information, please see the next section).
Detailed instructions: Professor Using Discussions
3) Assign content as homework
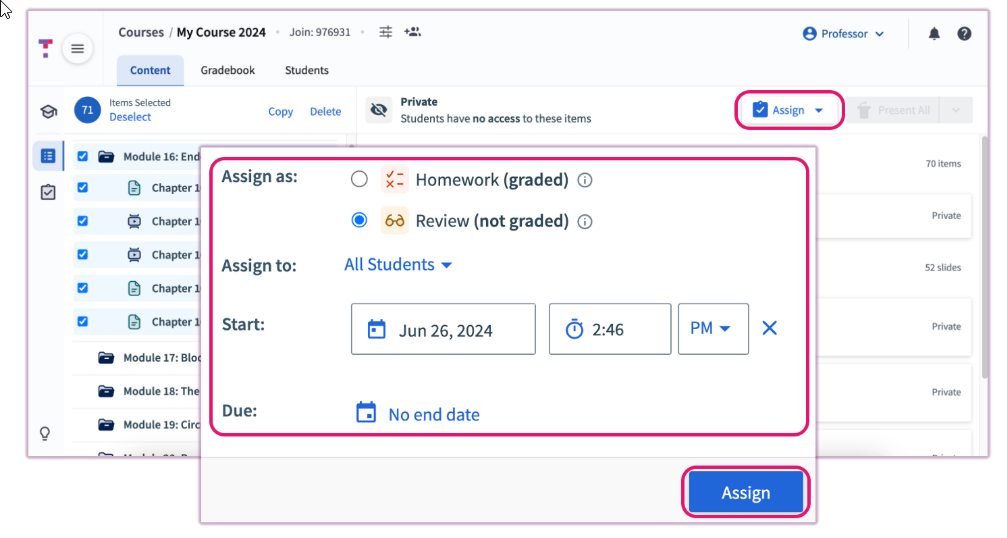
The Assign tool allows instructors to assign quizzes, discussions and other activities as homework to synchronous students, as a regular assignment to asynchronous students or as an ungraded review to students who would like to do makeup work.
This feature enables instructors to teach more effectively in HyFlex and Blended Learning settings as well as reconcile in-class and remote students in one course.
Detailed instructions: Assigning Content
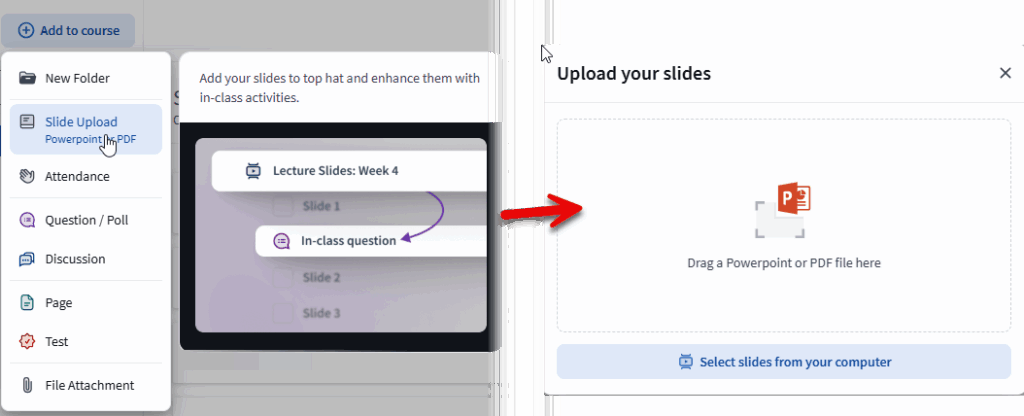
4) Upload a slideshow and embed interactive elements between slides
Top Hat enables you to chunk your lecture and make it more interactive by adding questions and/or discussions between your presentation slides.
- Upload slides
To upload a File to your Top Hat course:
Go to the Content section of your course.
Click the blue +Add to Course button in the top-left corner.
Select Upload File from the dropdown menu.
Drag-and-drop your file into the modal window, or click the link to browse and select it.
Wait for the upload to complete. Your file will appear in the course content tree.
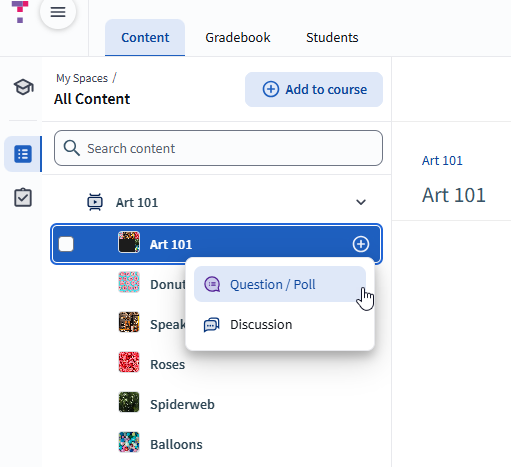
- Embed questions/discussions.
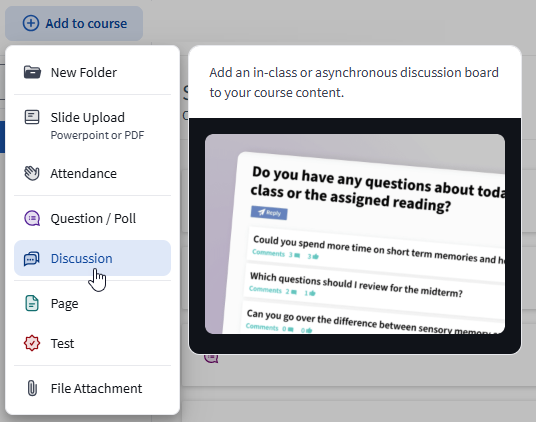
Once the slideshow is uploaded, you will see separate slides in Content. Next, create a question or a discussion by clicking on the + icon by the slide and selecting Question / Poll or Discussion.
Once you have saved your question(s) and/or discussion(s), you will see them showing up amongst your slides in the Content tree. If they don’t show in the right place, you can move them by dragging them with your mouse cursor to the right place.
When you click Present in the top right-hand corner, the questions and/or discussions will be presented in the slideshow between the slides where you inserted them.
Detailed instructions: Uploading and managing slides ; Presenting slides ; Asking a Top Hat question
5) Take attendance
Top Hat enables you to easily make a record of who is participating in your activities. You can take attendance in Top Hat in several different ways.
