Changing Quiz Settings (New Quiz Creation Experience)
There are many settings options for quizzes. The most common ones are listed below.
NOTE: When setting up restrictions for a quiz, please keep in mind that certain features may limit the use of adaptive technology and learning strategies. It is important to maintain a balance. Click here to find out more about Accessible D2L Quiz Settings.
For more information on how to create a quiz in the New Quiz Creation Experience, please click here.
Start, Due, and End Dates
Start, Due, and End Dates can be used to make a quiz available to students during a specific timeframe. Generally, students will be able to view information about the quiz, but will not be able to start taking it before the Start Date or after the End Date.
Under the Timing & Display section (presented next), you have the option to set the quiz as an Asynchronous quiz, or a Synchronous quiz.
Asynchronous = Timer starts when the learner launches the quiz
Synchronous = Timer starts on the start date
Please note that this may have implications on how you set the dates and if certain settings are applicable.
This is what the date restrictions mean for the two types of quizzes:
- Asynchronous. A Due Date is the instructor-given date (and time) deadline for submitting a quiz. However, a student may submit after the Due Date, in which case it will be flagged as late, in red, in both the instructor and the student view. An End Date is more restrictive. It cuts off access to the quiz at the time set, where the student can no longer start a quiz. Note: In asynchronous quizzes, an End Date only restricts the ability to start the quiz, not to complete it. If a student starts a quiz that has a 60-minute enforced time limit at 5 minutes before the End Date/Time, the student will still have the entire 60 minutes to complete the quiz (in one go).
- Synchronous. You only need to set the Start Date for this type of quizzes. This will mark the real-time beginning of the quiz for learners. The quiz will end when its time is up as set in the Time Limit on the Timing & Display tab. Note: In synchronous quizzes, the Due Date and End Date are not applicable and can be left blank.
Set Quiz Availability Dates and Conditions
1- On the Edit Quiz screen, you may adjust any of the Availability Dates & Conditions settings:

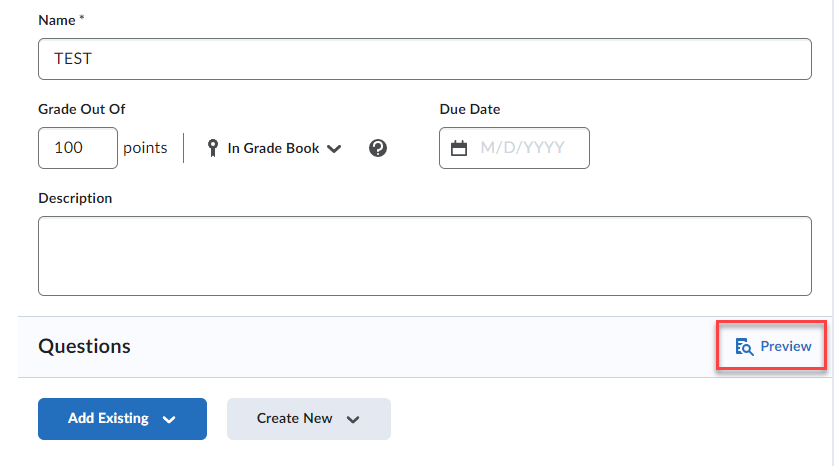
- If desired, set a Due Date [A] for the quiz. Enter the appropriate date and time.
- In the top-right corner of the screen, expand the Availability Dates & Conditions [B] section to set a Start Date and End Date for the quiz, and enter the appropriate date and time. (Keep in mind that the End Time is not relevant for synchronous quizzes.)
- Select the Add availability dates to Calendar checkbox to display the quiz Start and/or End Dates in the course calendar.
- Select Release Conditions [C] and add release conditions to make this quiz only viewable after the students have met specified criteria. Click here to learn more about setting up Release conditions.
- Under Special Access [D], select Manage Special Access to provide individual students Academic Accommodations if they require a longer time limit, different dates, or multiple attempts. Click here to learn how to set up Special Access.
- You can require a Password [E] for students to use in order to take the quiz. You can will display this password in the classroom when the quiz is administered to ensure that students are present.
- IP Restrictions [F]. At this time, we recommend not using IP restrictions for quizzes.
Timing & Display
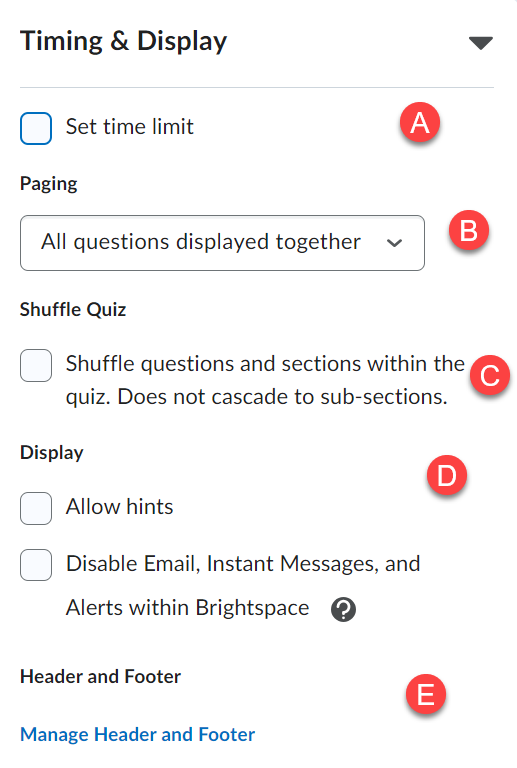
- Timing [A]. If you want your quiz to be timed, please check Set Time Limit. Once it’s checked, you will see an option to set the time limit and the Timer Settings.

- Under Timer Settings, you can choose an asynchronous or synchronous quiz.
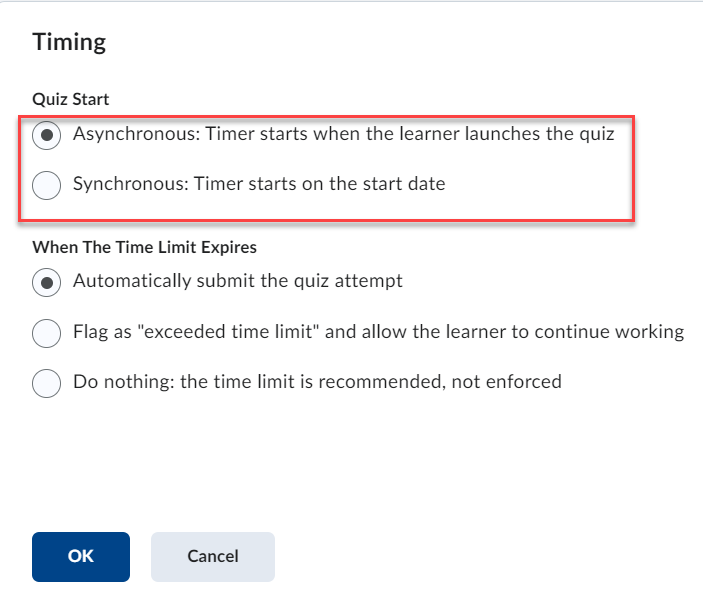
- Asynchronous quizzes are quizzes where the instructor sets the start date and end date for the quiz and the learner can launch the quiz at any moment within this time period. The countdown timer would start once the student launches the quiz.
- Synchronous quizzes are real-time quizzes where all learners start simultaneously and complete their quiz within the set time limit. Please note that for this type of quiz, only set the Start Date under Availability Dates and Conditions, not the End Date.
- Under When The Time Limit Expires, select one of the three options: “Automatically Submit the quiz attempt“, “Flag as “exceeded time limit” and allow the learner to continue working” or “Do nothing: the time limit is recommended, not enforced“.
- When you are done with the time settings, click OK.
Watch this video to see how to synchronize quizzes for learners
You can also watch this video created by D2L Brightspace: Synchronize Quizzes for Learners
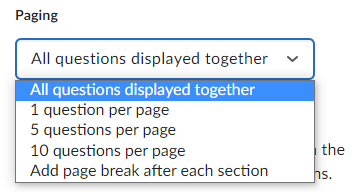
3. Paging [B]. Here you can select how many questions per page will be displayed to the students and add a page break after each section if your questions are grouped into sections.
4. Shuffle Quiz [C]. You can choose for the questions to shuffle within the quiz, which is one of the cheating prevention options.
5. Under Display [D], you may allow hints for students as well as Disable Email, Instant Messages, and Alerts to prevent students from accessing them
6. Under Header and Footer [E], you can add a Quiz Header and Footer that will be visible to learners at the top and bottom of the quiz, respectively.
Attempts and Completion
By default, students are allowed one chance to take a quiz. As Instructor you may choose to allow students multiple attempts.
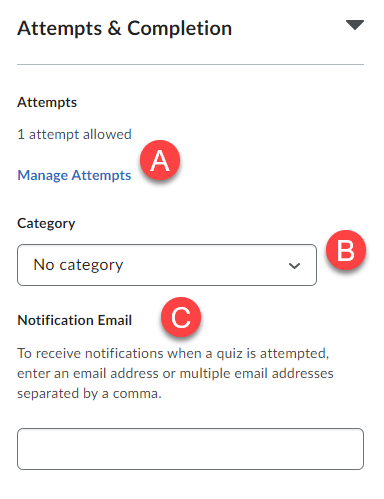
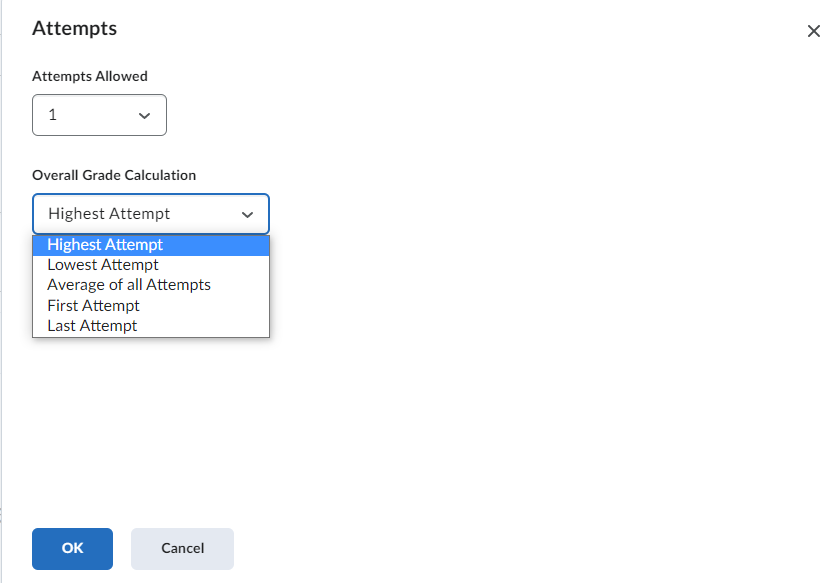
- Under Attempts [A], click Manage Attempts to select 1 to 10 or an unlimited number of attempts for the quiz. Under Overall Grade Calculation, specify how the quiz score will be calculated. (The default option is Highest Attempt, but there are several other options, including Average Score.) Select OK to save your settings.
Note:
If multiple attempts are allowed and the quiz is associated with a grade item, the score to be transferred to the gradebook will need to be specified.
You can change the number of attempts across multiple quizzes on the “Manage Quizzes” page by selecting the checkboxes next to the names of the quizzes, then select the Bulk Edit link at the top of the list. Reset the number of attempts for each quiz in the “Attempts Allowed” column.
2. Category [B]. Select a category for your quiz if you organize quizzes into categories (optional).
3. Notification Email [C]. Enter one or multiple notification emails to receive notifications each time a quiz is attempted by a student.
Evaluation & Feedback
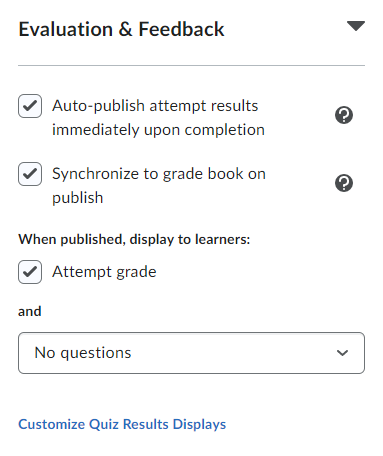
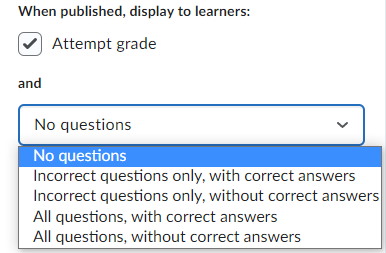
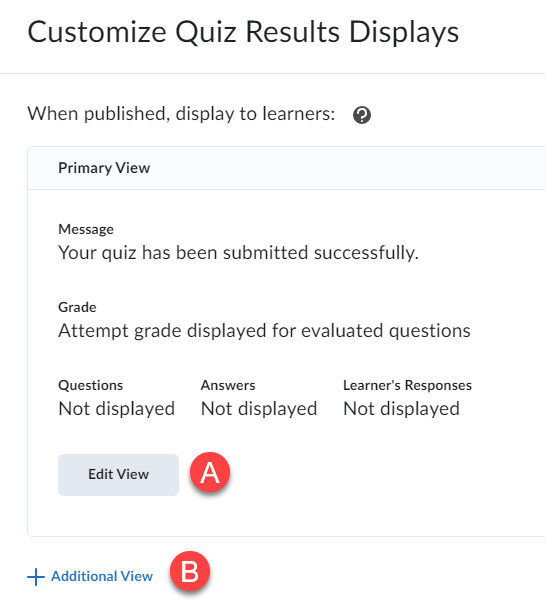
By default, newly created quizzes will auto-publish results to students upon completion on the quiz attempt page and in some cases, to the gradebook. If you do not want either or one of this to happen, uncheck the Auto-publish attempt results immediately upon completion and Synchronize to grade book on publish options. You can also select what will be displayed to students when the results are published.
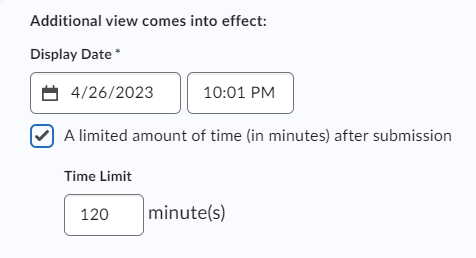
It is also possible to customize what students will see upon quiz completion by clicking Customize Quiz Results Display. You can either edit the primary view [A] or add an Additional View [B] which will appear after or for a certain time.
When you have finished working on your settings, click OK.
Click here to learn how to make feedback visible to students.
Once the quiz settings have been changed, preview the quiz to make sure everything is correct before students begin taking it. By using the Preview option you can test the accuracy of content and grading before you release a quiz. In Preview, you can answer the questions, view allowed hints, submit the quiz, auto-grade answers, read feedback, and view report results.